
sCRUNCHie Tutorial
Quick and easy scrunchie tutorial to bring some nostalgia back into your life.

Step 1
-
Cut your strip (or strips). I prefer to use dimensions 25" long by 3.5" wide, but you can play around with those dimensions and find what you you like best.
* You can use any type of fabric for these. It's a great way to use up old scraps of fabric.

Step 2
-
Fold your strips in half with the right side of the fabric facing in.

Step 3
-
Starting about an inch to inch and a half down from the corner on the open side, stitch or serge along the edge.

Step 4
-
When you get to the end, finish about an inch from the bottom edge.
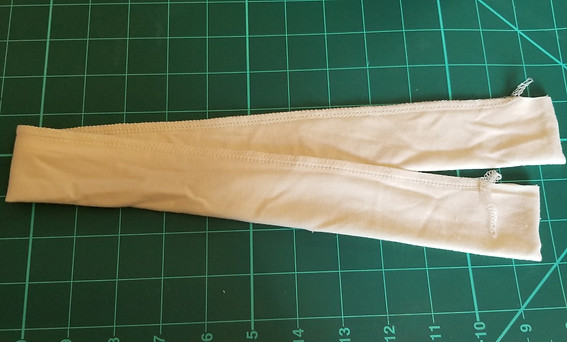
Step 5
-
Your strip should look like this.

Step 6
-
Flip the tube right side out.

Step 7
-
With the seam straight and facing up (not twisted), grab the to ends, and pinch or pin them together.

Step 8
-
Take the tube to your machine.
-
Starting at the corners, stitch the two short ends together. This takes a bit of playing around, because the fabric has to be manipulated and curved, as you sew.

Step 9
This is a lot easier to do with knits than woven's, because you can stretch them as you sew.

Step 10
-
Here's how the seam should look, when you're finished.
*Sometimes the fabric underneath gets a bit bunched, and it can be difficult to get this seam perfect, so it's okay if it's not perfect.

Step 11
-
"Stretch" out the tube, so that the seam goes inside. This part is so satisfying!

Step 12
-
Measure out your elastic to 9.5". I choose this length so that it's not too tight on the wrist.
You can use either rope elastic or regular 1/4" elastic.

Step 13
-
Put your elastic onto a bodkin turner or a safety pin.

Step 14
-
Going in from the opening of your tube, bring your elastic all the way through the tube and out the other side.

Step 15
-
Scrunch up your fabric and tie off your elastic. Make sure the knot is really tight, so that it doesn't come apart when stretched.

Step 16
-
Next, you need to close up the hole. You can either do this by machine, or by hand.

Step 17
-
Fold the ends in and pinch or pin them together.

Step 18
-
To close up my opening, I like to double up my thread, and run it through my wax, and then do an invisible stitch.

Step 19
-
If your invisible stitch is sloppy like mine, just tighten it up a bit.

Step 20
-
Voila!

Step 21
-
Tie off your ends and if you can, tuck your knots into the seam.

Step 22
-
All finished!!
-
Take a photo of your creation, and then show it off to the world!